Monday, November 28, 2022

cmos crash and suddenly you get a new screen during boot up

 The other day, my Dell laptop did not start up win 10. It showed a blue screen saying "Boot device not found". At the same time I noticed a new screen after the bios messages saying something about intel rapid storage technology.

WTF was wrong? I could boot into win 10 again by safe boot and rebooting afterwards. But the new intel screen remained. I could find the answer in this discussion: Stop INTEL RAPID STORAGE upon bootup

According to the discussion it might have been a crash of the cmos that led to this strange behavior. Once I changed the SATA mode to AHCI and did another safe boot into win 10, the error was resolved.

Sunday, December 05, 2021

Updating my Vorke Z6+ via an USB cable to my laptop

 I have two Android boxes: Vorke Z6 plus. I love these little boxes even though they have a rather old Android version 7.1 now. The latest firmware of one of the boxes is from 06-06-2018. I updated it with the so-called "SD method" where you simply copy the update file onto the SD card and start the upgrade process on the box.

I did this 2 years ago and deleted the upgrade file afterwards. How unfortunate! Because I cannot find this type of upgrade file anymore on the internet. I can only find the SD file type for an older upgrade file: the 26-01-2018 or even older ones.

The other type of upgrade file of the 06-06-2018 version of the firmware needs a laptop and a USB cable  in order to flash the box. It would completely wipe the system with all its settings. That was one of the reasons why I did not want to do it. The SD method preserved the settings.

However, this weekend I downloaded the files from getdroidtips.com and gave it a try. I already had the necessary male2male USB cable (who normally needs something like that?) from reichelt.de so I had everything I needed... except for the guts to risk bricking my beloved Vorke box.

In the end I turned out to be rather easy. You simply download the USB burn tools and follow the steps here at droidfilehost.com or getdroidtips.com. I used the tool with a higher version which needed a restart after I switched the language to English. And the box did not show up as connected once it was in recovery mode and connected to the laptop using the "weird" USB cable.

But once you use the menu option "Setting > Load img" and select the img file to flash, the program recognises the box and you can proceed with the process.

Everything went fine and I could reinstall my Android apps. Well, Netflix and Disney+ need the Aurora app from F-Droid because the Google Play Store refuses to install these apps on the Vorke box.

Other webpages that I did not use or check:

Tuesday, October 22, 2019

Error 0xc190012e during Windows 10 update to version of May 2019

My Windows 10 installation could not update itself to the version from May 2019. I tried several actions over the last months but to no avail.

Today, I finally managed to update it by using the Microsoft Media Creation Tool like describe here:
https://answers.microsoft.com/en-us/windows/forum/all/update-1903-error-0xc190012e/d3f73063-f445-4093-9af0-c43f0108a58a

Saturday, November 07, 2015

How to fix Link2SD's "read only file system" error

A few months ago I had trouble with my Android phone with Link2SD installed (in "root mode"  of course). Whenever I wanted to update an app on the partition the error message appeared "read only file system".

Furtunately I found the following entry in the xda developers forum: http://forum.xda-developers.com/showthread.php?t=1493649

The explanation for the error message from Link2SD is an error in the EXT2/3 file system that causes that no more files can be written on the partition unless the errors are fixed. The solution described in the forum worked like a charm for me:
  1. Boot GParted as a Live-CD (in my case in Virtualbox)
  2. Insert the SD card (and connect it to the Virtualbox)
  3. use the action "Check" within GParted to check the partition on the SD Card - this will also fix the file system errors
Thanks to everybody in the forum who wrote the solution and saved my day.

Friday, September 27, 2013

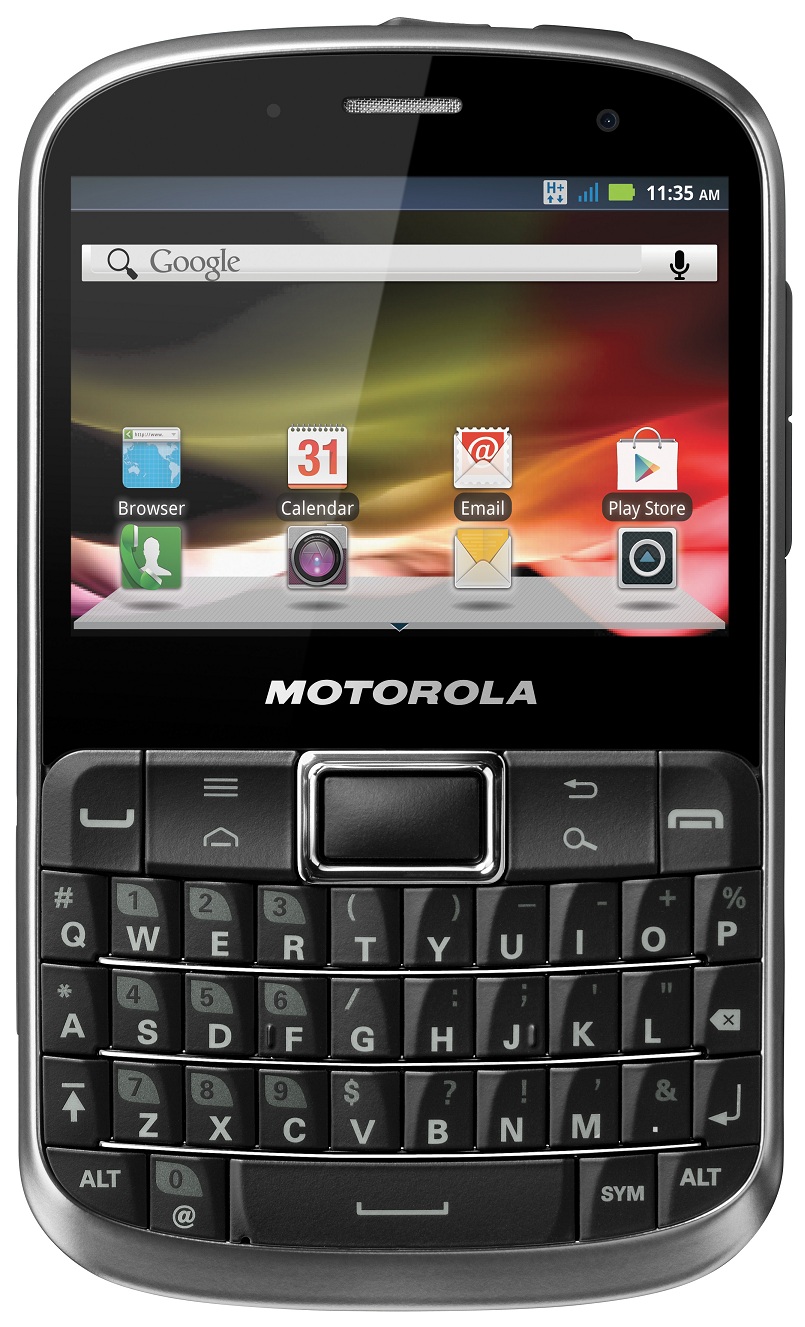
How to root a Motorola Defy Pro (XT560)

After my Motorola Pro+ died and I could not get a new one I was looking for a new Android phone with a good keyboard. So I ordered a Motorola Defy Pro (XT560) from the US because the phone is not available in Europe - only in India, Brazil and North America.

I was so happy when I got it that I installed my "usual stuff" on it only to encouter that the memory of the Defy Pro is much smaller than the one of the Pro+. But that's nothing to worry about because I can install Link2SD on it - so I thought.

But Link2SD needs a rooted device so I tried to root the Defy Pro with the software that I had for my Pro+. It turned out that it didn't work. Then I searched the internet but I could not find a how-to for a Defy Pro. But I did find one in portuguese: https://groups.google.com/forum/#!topic/androidbrasil/cRs4iU6Nsxk
One of the group members created a how-to that was also in portuguese: http://bruno.tuy.com.br/blog/?p=173
This is what Google Translation made of it:
ROOT release the Motorola Defy Pro (xt560)

1 - Install Motorola drives in windows. Motohelper_2_0_53_driver_5_2_0_012027

2 - Place the phone in developer mode and then turn on the computer.
Settings -> Applications -> Development -> USB Debugging (check this option)

3 - Install Software Update Tool.

4 - Open the Software Update Tool because we will be upgrading cell. You will upload a file there. This xml, FXX_PR3_NV.xml, downloads and puts it around and advances.
The phone will reset itself and when it is already on the process has ended.

6 - Lower the SuperOneClick and unzip in any folder, it will be for him to root the device will be released.

7 - Run the SuperOneClick as administrator, just click with the right mouse button on top of the executable that will appear in this menu option.

8 - Click on the root SuperOneClick will do the job. The process is almost instantaneous is super fast. Ends when he warns that the root was successful.

9 - You can turn off the phone and unplug the computer when connecting Superuser checks if the program is installed, but if the root was released successfully.
Credits: http://www.thespicygadgematics.com/2012/08/how-to-root-motorola-motoluxe-237.html
I never used the Software Update Tool or SuperOneClick so I was surprised to see that I needed completely new tools. And I was really disappointed to see that the Software Update Tool (SUT LR) did not except the XML file that was supplied. It always reported "Invalid file".

Last night I tried it again and it worked. Honestly I have no idea why it worked now but not back then. Anyway if you are interested in the additional links/files I used - here is a list:
  1. Motorola Motoluxe root [German]
  2. How To Root Motorola Motoluxe 2.3.7 Gingerbread Firmware 
  3. New One Click Root (with SUTLR method) 
  4. Rooting Motorola Fire using SuperOneClick 

Monday, August 27, 2012

Moving from VMWare to VirtualBox

There is always a good reason to migrate 'some stuff' from one platform onto the other. Most of the time it's just 'because I can do it' or 'I wanna try it'. This time I had to do it for work. We needed to move one Windows XP Virtual Machine running on VMWare Player to Virtual Box. And of course the web was full of information that helped me to get the task done. Therefore I just copy the links here for you (and me) to see what needs to be done in order to get it working:
  1. First we need to deinstall the VMWare Tools in the VM and power it off.
  2. Then we need to migrate the VMDK into a VDI which worked like a charm after I found this link.
  3. After that I tried to start up the system but it failed because the agp440.sys driver hangs. As a solution you can simply delete or rename the file. For that I booted a Live-CD inside the VM and renamed the file agp440.sys.
  4. But the VM still would not start. This time it hang after loading the mup.sys. But I found a good solution here. So I simply switched on the IO-ACPI and I could start the XP.
  5. Boot into Safe Mode: I booted the VM and it took ages to see the desktop. Then the Windows XP tried to update its drivers to match with the new (virtual) hardware settings.
  6. Install the Guest Extensions for a better integration of the VM into your host system and... 
voila - that's it. :)

Tuesday, August 23, 2011

Palm Pixi Plus rocks! Firmware upgrade to 1.4.5 does not!

Recently I bought a Palm Pixi Plus. It was available for a very reasonable price like 100 Euros. It's not state of the art but it's enough for my tasks. When I encountered Preware I could get rid of a lot of nasty things I didn't like about the webOS apps. That's definitely the best thing about the webOS.
But some apps did not work. The hang during startup and I could not get them to work. One of the apps I could not run was Done!. Their support directed me to the software lumberjack which was able to display the logfiles of Done! and several other apps. There I could see that nearly all the apps had the same problem during startup. Even the Preware software had the same problem during startup:
INVALID_STATE_ERR: DOM Exception 11

After a lot of trial and error I was able to pinpoint it down to the firmware upgrade to 1.4.5 - the highest version number for the rather 'old' Palm Pixi Plus series.
So I run webOS Doctor to reset my phone and get a fresh firmware 1.4.5 onto it. After I managed to get the phone into USB mode I was able to install the firmware. After that install all the apps worked correctly and I'm more than happy with my loved Pixi Plus!